前言
擴充性高的部落格框架有許多功能或是套件需要自己手動加入,因此在研究如何顯示瀏覽人次的同時記錄整個過程。
使用 Firebase
建立 Firebase 專案
到 Firebase 官方網站登入後,再建立專案
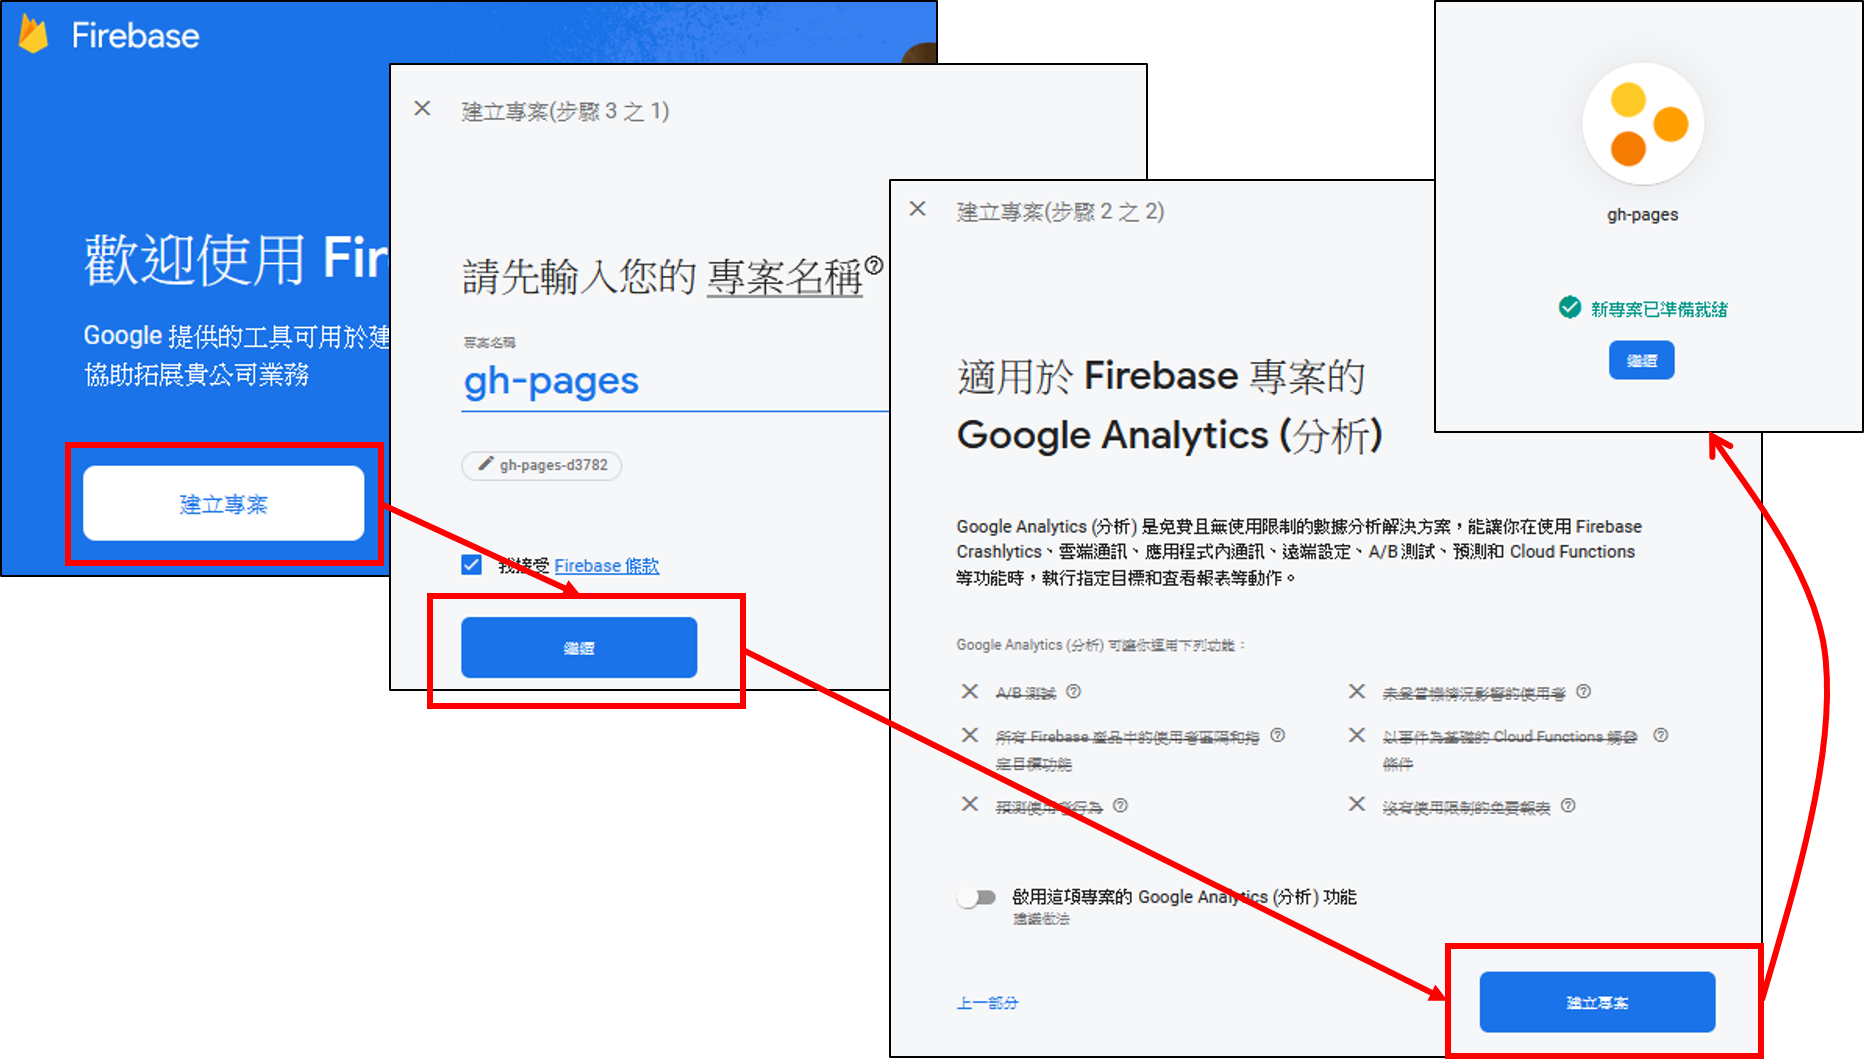 建立 Firebase 專案
啟用 Authentication 功能
必須要啟用此功能才會有 apiKey!再記住 專案 ID(projectId) 與 網路 API 金鑰(apiKey)
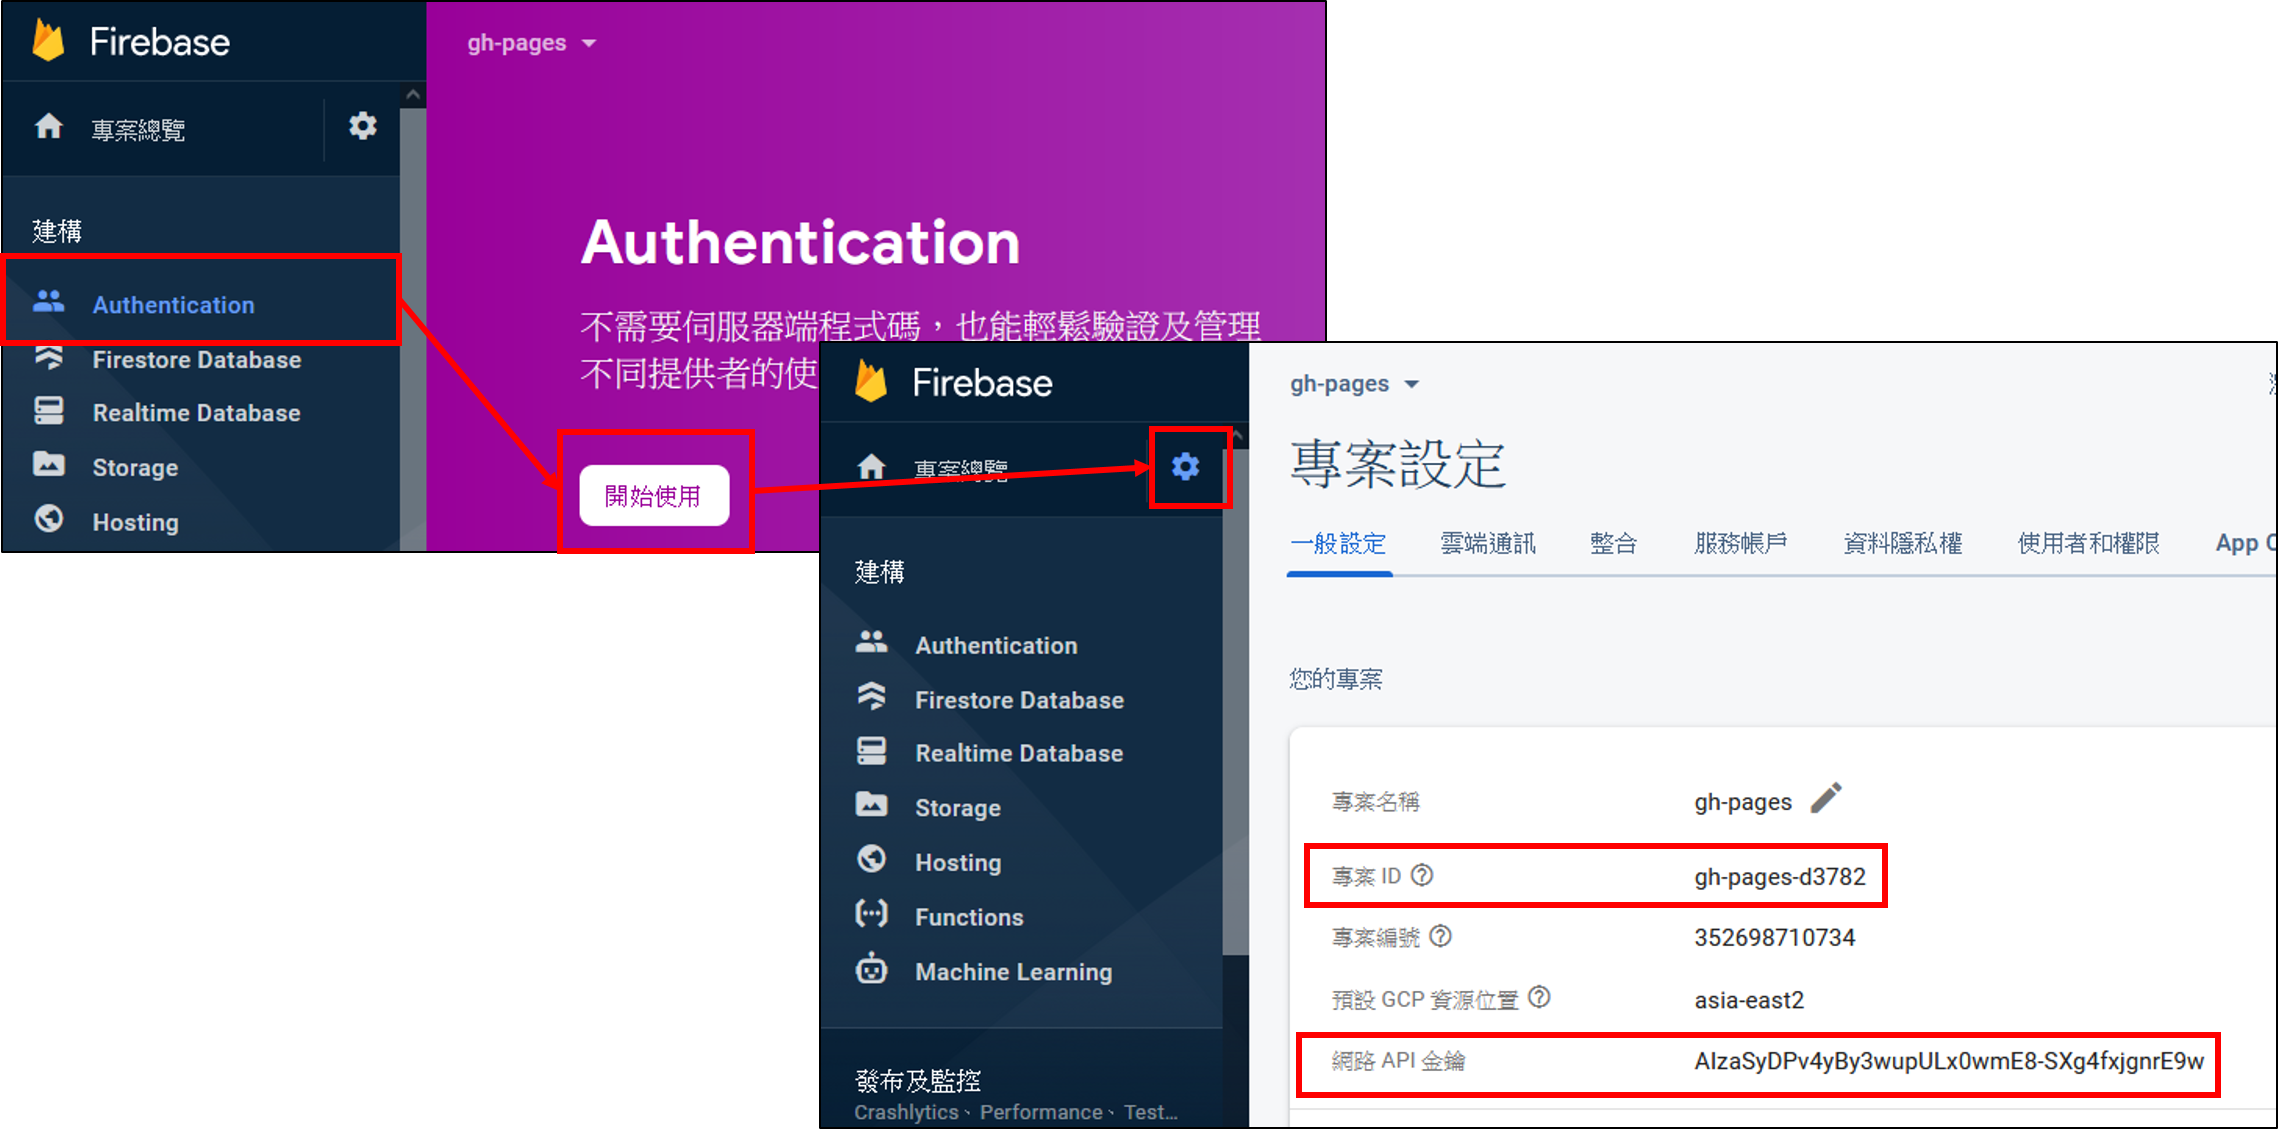 啟用 Authentication
建立 Firestore Database
建立的過程中選項先選擇 以測試模式啟動,之後測試若沒有問題會再改為較安全的安全性設定。
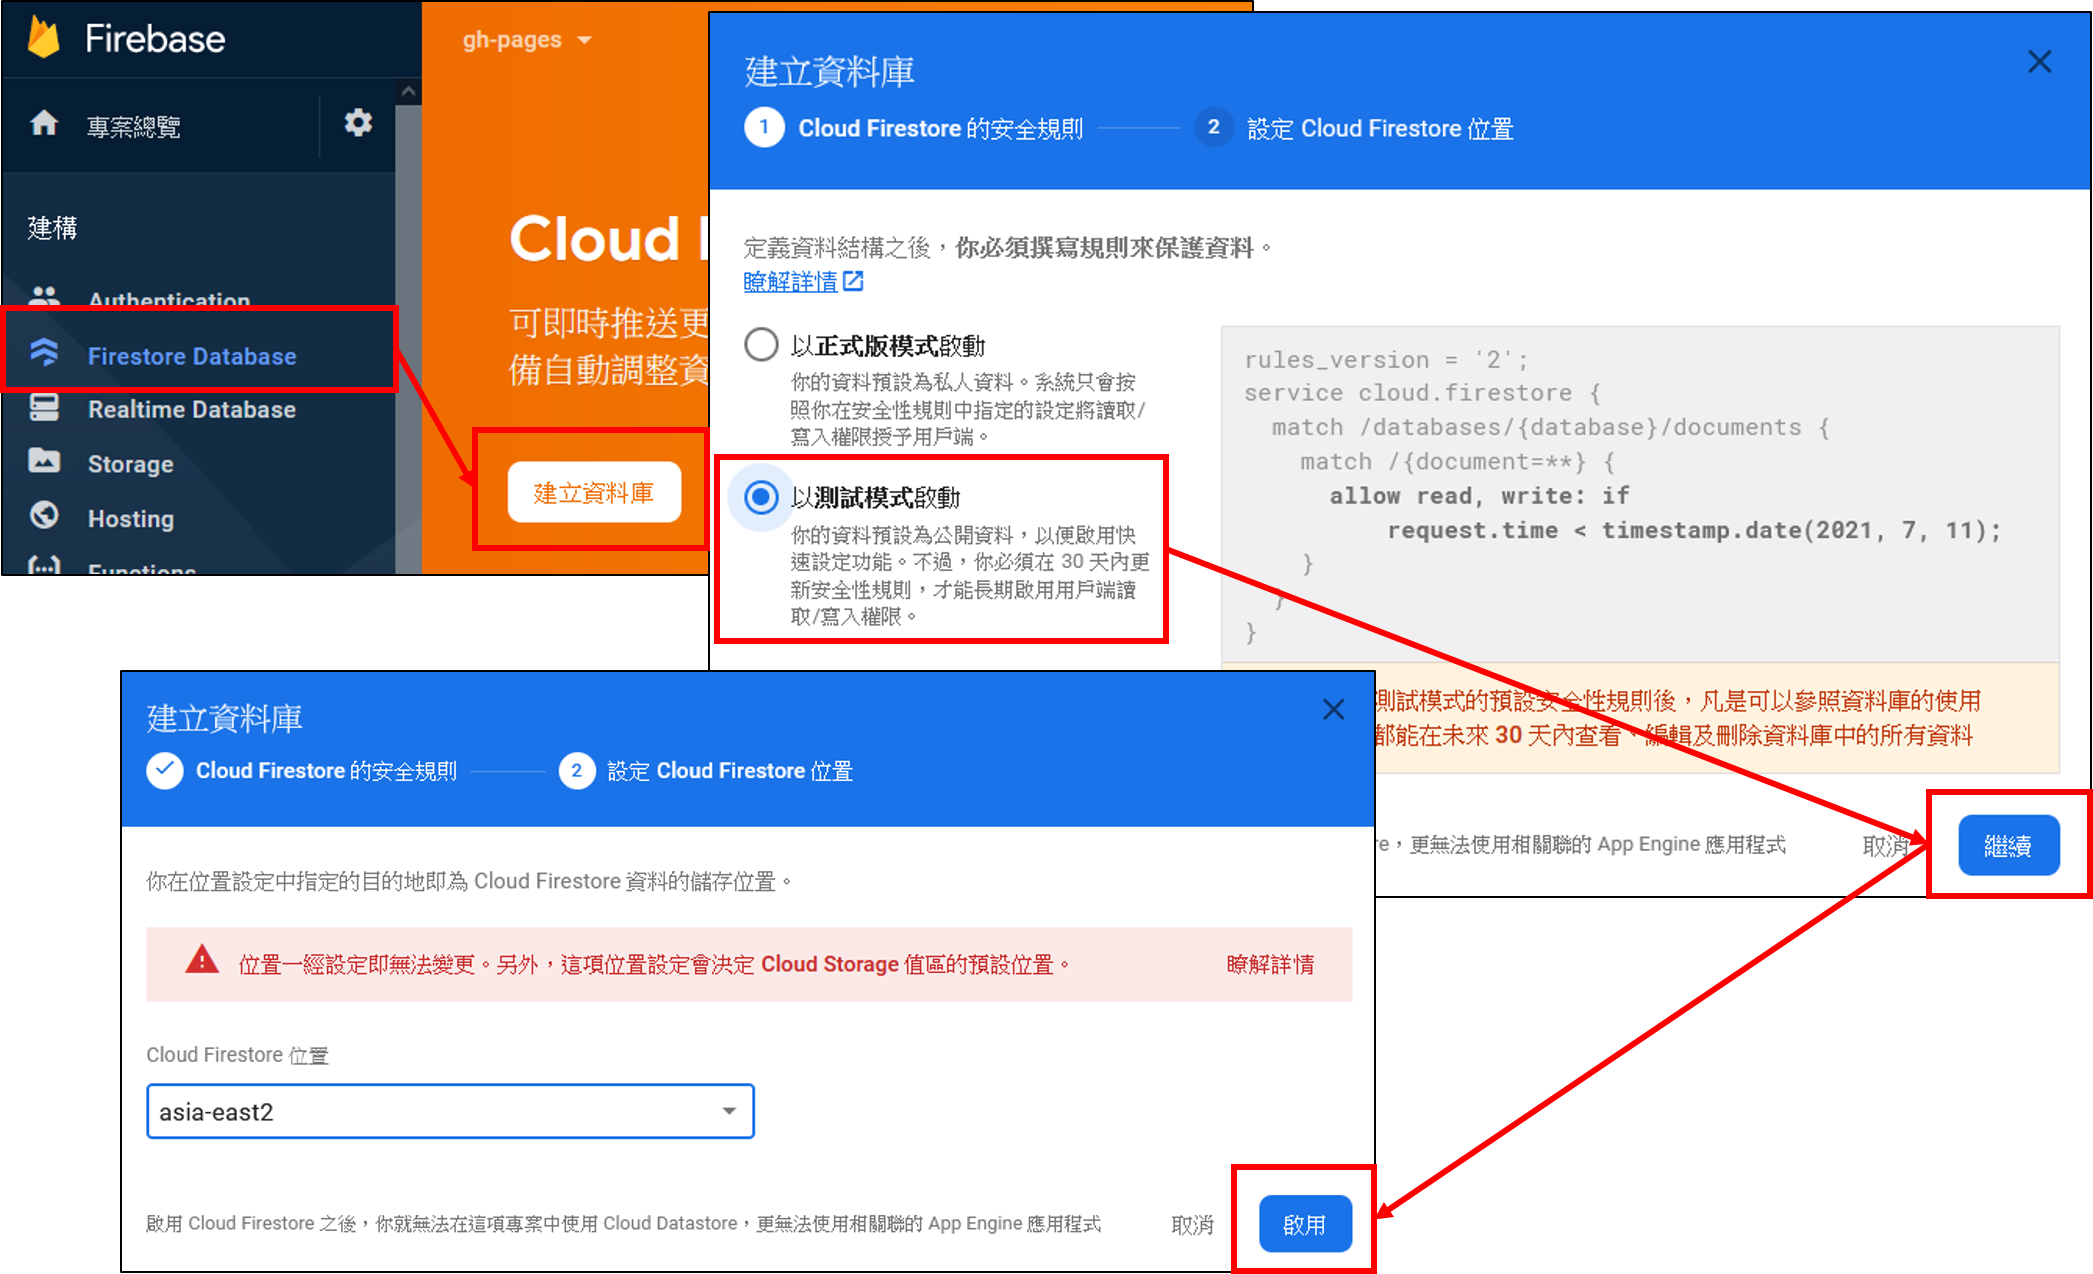 建立 Firestore Database
修改 _config.yml
Hexo 本身設定檔 _config.yml 內 url 的值必須與正式的 Domain 相符,這個值表示此部落格預計對外服務的 Domain。這是因為 Next 主題會先判斷使用者閱讀的網頁該 Domain 是否與 url 欄位的 Domain 相同,若相同則表示該流量來自對外公開的站點,是真的使用者帶來的瀏覽流量,盡可能的避免我們在 localhost 測試時影響到真實的瀏覽數!
1 | url: https://weirenxue.github.io # Modify this to meet your situation |
themes/next/_config.yml
1 | firestore: |
enable:改為 truecollection:不用更改,預設為 articlesapiKey:網路 API 金鑰projectId:專案 ID
修改好之後就可以發布囉,計數在發布後才有效,本地測試是沒有用的哦!
1 | hexo d -g |
測試
可以試著點擊文章,看是否真的有計數,並且可以看到 Firestore 有一個叫做 articles 的 collection,裡面有紀錄每篇文章的瀏覽次數。
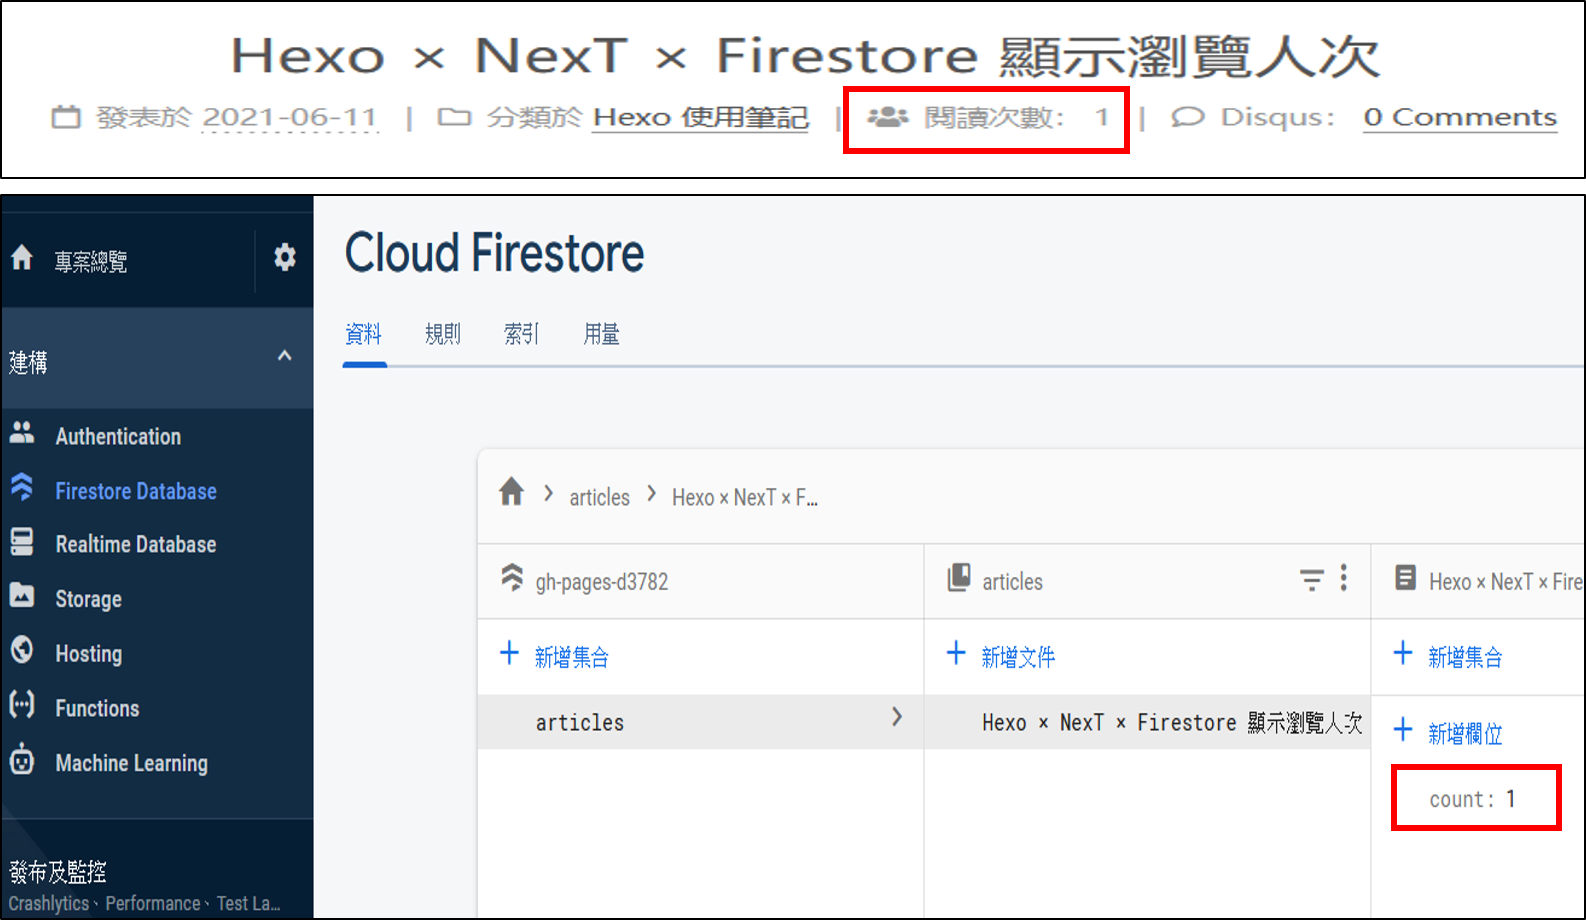 閱讀次數測試
修改 Firestore 安全性設定
確定有寫入後,那就要修改一下 Firestore 的規則,讓應用對特定的 collection 或 article 擁有特定的權限,要特別注意的是,有時候測試雖然會看到從 0 變成 1,但在 firestore 卻沒看到數據,最有可能的原因就是 firestore 安全性規則擋掉了創建文件的權限。
 Firestore 安全性設定
1 | rules_version = '2'; |