前言
此篇文章紀錄如何在 VS 2017 寫一個 dll,其包含 DllMain 與一個 dllexport 函數。若要知道如何在其它的 C++ 專案中調用在 dll 中的函數,請參考 [DLL] 在 C++ 中調用 dll 的函式。
環境
- Windows 10
- Visual Studio 2017
創建專案
確認環境
開啟 Visual Studio Installer,確認 Desktop development with C++ 已安裝,才可進行下面的步驟
 確認環境
確認環境
新增專案
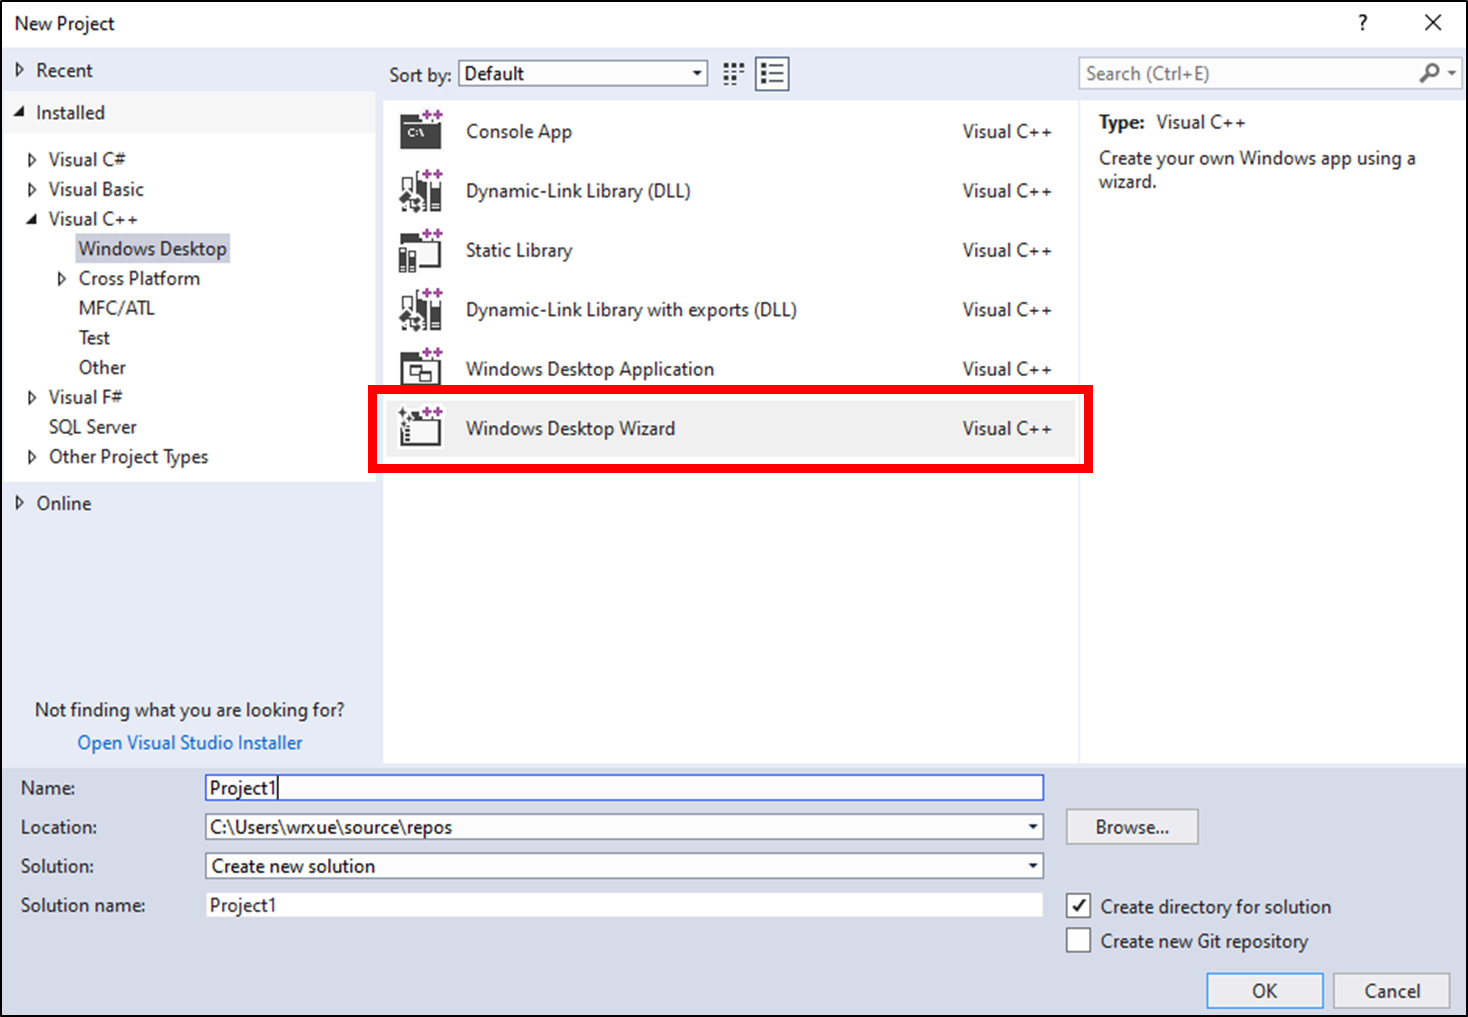
開啟 VS 2017,新開一個專案 File → New → Project 或組合鍵 Ctrl + Shift + N,點擊 Visual C++ 之下的 Windows Desktop,選擇 Windows Desktop Wizard,在 Name 輸入好專案名稱後,按 OK 進到下個步驟
 新建專案
新建專案
 選擇專案類型
Application type 選 Dynamic Link Library(.dll),Addtional options 都不用勾!按下 OK 就會建立好一個專案,預設會自動開啟專案中的 dllmain.cpp
 選擇 dll
編寫程式
將下面的程式碼貼到 dllmain.cpp 中,(參考原始碼:GitHub)
1 | // dllmain.cpp : Defines the entry point for the DLL application. |
完成
點擊功能選單 Build → Build Solution,可在 Output 視窗看到下方提示,會在專案下的 Debug 目錄產出 dll 檔案,檔名與專案名稱相同
 Build Solution
1 | ------ Build started: Project: Project1, Configuration: Debug Win32 ------ |
此時的 Project1.dll 就是包含 DllMain 與一個匯出函式 helloWorldFun 的 dll 檔案囉!